
Deprecated: array_key_exists(): Using array_key_exists() on objects is deprecated. Use isset() or property_exists() instead in /nas/content/live/trees4future/wp-content/plugins/ht-knowledge-base/php/ht-knowledge-base-category-ordering.php on line 58
Deprecated: array_key_exists(): Using array_key_exists() on objects is deprecated. Use isset() or property_exists() instead in /nas/content/live/trees4future/wp-content/plugins/ht-knowledge-base/php/ht-knowledge-base-category-ordering.php on line 60
Chapter 14: Compost
Importance of Soil Quality
As we have said before and will say again: healthy soils yield healthy crops. They are the basis of any agricultural system and are vital for providing your crops with the mineral nutrients and moisture they need, when they need it. Enhancing the air, water, and organic matter in your soil, and protecting all the beneficial organisms that live within it, will result in sustainably higher yields of better-quality crops, be it vegetables, field crops, fruits, timber, or anything else that grows in your soils. With the Forest Garden Approach we aim for long-term health and productivity of soils, and this often starts with revitalizing highly degraded soils. This can be accomplished through utilization of the agroforestry technologies you have already learned, and it can be enhanced through the addition of locally available soil amendments and proper soil management. In your tree nurseries, you will want to give your seedlings a great start in life by providing them with healthy, fertile soils in which to grow. Keep reading for a basic description of soils and amendments for your nursery.Soil Texture and Types of Soil
There are many different types of soils, with complex systems for classifying them by their distinguishing characteristics. What we are most concerned with—or at least what is easiest to begin with—is the soil texture. Soil texture is classified by the size of mineral particles present in it, of which there are three: sand, silt, and clay. The soils we normally come across are often a mix of the three, and the amount of each in the soil determines the texture: how it feels, how it holds water and nutrients, and how it should be managed.Drawbacks of sand for nursing trees
Sandy soil is the largest in particle size, and because of this, water drains through it rapidly, carrying nutrients with it. Fewer plants are able to grow in sandy soils as their roots do not have the chance to absorb the water and nutrients that flow quickly through them. Sand is often found in riverbeds and streams. Silty soil is made of particles much smaller than sand, and is able to retain water for longer.Drawbacks of clay for nursing trees
Clayey soils have the smallest particles of the three types. Water is much slower to drain in clay, and it holds nutrients much better. However, it can become very hard and dense, especially when dry, making it difficult for plants to get the air they need to grow.Loamy soil & humus: ideal for nursing trees
The best soil, which we aim to raise our seedlings in—both in sacks and bareroot—is loamy soil, or loam. Loam contains a balance of the three soil materials mentioned above, plus humus – dark, nutrient-rich material formed by the decomposition of organic matter. Loam is dark in color, and is soft and crumbly in your hands. It holds water and nutrients well, but also allows for drainage and movement of air between soil particles and through the root zone. If you don’t have easy access to humus, which can generally be found on the surface of healthy forests, you can substitute compost or even dried manure, which both host the same characteristics of rich organic material teeming with nutrients and microorganisms.Finding the Right Soil for Your Seedlings
As with plants in the Forest Garden, the seedlings you raise in your nursery will grow best if you raise them in a loamy medium. A perfectly loam is not always easy to create, but we can often get close by mixing the soils we have access to, along with some humus, compost, or dried manure, to provide nutrients for our seedlings. A good mix of soils for use in raising your seedlings can be made from 3 parts topsoil to 1 part humus-rich soil to 1 part sand. Both before and after you mix your growing medium, a simple way to determine what type of soil texture you have—and whether or not you need to add more of other types—is through a simple soil testSimple Soil Test
A. Grab a handful of soil, make a fist with it, and stick it in a bucket of water, holding it tight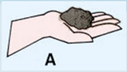 B. Remove your hand from the water and crush the soil between your fingers
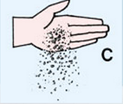
 C. If there is little resistance and the sample falls into dust, it is mostly sand and lacking in clay
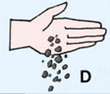
 D. If there is medium resistance, it is silty clay or sandy clay
 E. If there is great resistance and the sample remains intact, it is mostly clay

Changing Soil Composition
In conducting the Simple Soil Test, if you find that you have mostly sand (c), you can add humus, compost, or dried manure to create a better texture. If you have great resistance (E), you can add sand from a nearby river or streambed. In all cases, unless you are blessed with soil that is already fertile and well-structured, you should amend your planting medium to ensure your seedlings have the nutrients they need to thrive, both in the nursery and while growing in your Forest Garden. We will talk more about amending your soil below. In many places, a good mix that would provide a loamy soil is 3 parts topsoil to 1 part humus, compost, or dried manure, to 1 part sand. It is important to ensure that the mixture will contain sufficient nutrients to support the development of seedlings, while having proper drainage. Make sure to sift the final mixture and water for moisture.Soil Amendments and their Benefits
A soil amendment is any substance added to the soil to improve plant growth. Soil amendments can add nutrients, enhance soil structure, improve water retention, protects plants’ roots against pests and disease, or change the soil pH level. When working with highly degraded soils, amendments are needed to improve both the nutrient content and structure of your Forest Garden soils. Below is a list of some of the major soil amendments and their effects on soil.- Bone meal – Made from crushed bones, this slow-release soil amendment contains large amounts of phosphorus and calcium. Adding bone meal to the soil makes it a good part of a long-term soil correction strategy for pH problems (i.e. it decreases soil acidity) and calcium leaching. Bones are easier to crush if they have been cooked in a fire for several hours.
- Biochar/charcoal powder – This purified form of organic carbon is most useful for water retention, as it can hold up to six times its weight in water. Additionally, charcoal is covered in micropores, which provide living space for beneficial bacteria in the soil. A balanced microbial content in your soil helps with nitrogen fixation, nutrient release, and pest suppression.
- Compost – The nutrient content of compost is variable, and is entirely dependent on the materials which were used to make it. As compost is fully decomposed, the nutrients are easily absorbed by plants. Naturalized soil bacteria are abundant in compost as it is generally formed from local organic materials As the material in compost is fully broken down and the structure is stable, it is also the best amendment for improving soils with poor water retention or severe compaction. Look at the Compost section to learn how to make it.
- Egg shells – Egg shells are high in calcium and especially good for cabbage family crops. They are often available in large quantities from local breakfast vendors. You can pound them into a fine powder before adding them directly to the soil, or into your compost pile.
- Coffee Grounds are an excellent and, depending on location, abundant source of organic nitrogen. It is already in a stabilized form and is slowly released into the water in the soil for uptake. Coffee grounds can be added to the compost pile, mixed directly into the soil during the double digging process, or added as a soil amendment when planting trees or other plants around the homestead.
- Leaves (green and brown) – Decomposing quickly due to their size, leaves are useful for quick nitrogen and carbon inputs. As we’ve discussed, leaves can be a very useful green fertilizer or mulch. Depending on species, they will have varying effects on soil structure, nutrient loads, pH, and pest problems.
- Manure – One of the most readily available soil amendments in rural farming communities, manure is heavily loaded with nitrogen and decomposers. Manure will slowly break down, releasing nutrients and slightly improving soil structure. Be sure to let the manure decompose or dry out before use to prevent the potassium and phosphorus from “burning” the plant in their raw state. However, manure can attract termites, and can contain large quantities of weed seeds, so compost is preferable when available.
- Wood ash – This quick-release pH stabilizer contains soluble potassium and phosphorus. It does not have the long-lasting effects of bone meal and biochar, so should be reapplied annually to counter severe pH problems.
NOTE: It is common in some places for people burn large quantities of plastic in a fire. Be sure that the wood ash you collect comes from a pure wood fire, as plastic is toxic to the soil and harmful to your health.
Compost
Compost is an essential part of any healthy garden. The many benefits it provides makes it one of the most important and essential components of your permagarden as well as your Forest Garden. Compost drastically improves soil structure and fertility, helping you to produce sustainable yields of highly nutritious and lucrative crops. It can help sandy soils hold nutrients and water better and can improve drainage of clayey soils. Over time, compost can restore vitality and productivity to even the most degraded soils. Billions of microorganisms live in a single handful of compost. These microorganisms are constantly working for your garden by breaking down organic matter into nutrients that plants can readily absorb, and by burrowing massive networks of tunnels around your plants’ roots and deep into the soil to improve air and water circulation.Benefits of Composting
Compost is fairly easy to make, using materials that are available in, on and around the household, garden, fields and neighborhood. Some of the many benefits include: Improved structure: Compost feeds the immense number of beneficial insects and microbes in the soil. These organisms burrow networks of tunnels around the root systems of the plants, improving aeration and water infiltration. This allows for better root growth, enhances water drainage in clayey soils, and improves water and nutrient retention in sandy soils. Aeration: The vast majority of the nutrients plants need to thrive is obtained from air, sun, and water. Compost loosens the soil, allowing air and moisture into it and enhancing the exchange of nutrients. Carbon dioxide released by the decomposition of the organic matter diffuses out of the soil and is absorbed by the canopy of closely spaced plant leaves above. Fertilization: Compost contains some important macronutrients like nitrogen, phosphorous, potassium, magnesium, and sulfur, and it is especially important for trace elements such as molybdenum, zinc, and iodide. Nutrient release: Organic acids from decomposing organic matter dissolve soil minerals, making them available to plants. As organic matter continues to break down it slowly releases key nutrients for plant uptake and to ensure a healthy soil microbe population. Nitrogen storage Nitrogen, one of the most important of plant nutrients, is also the most volatile. If added to soils low in organic matter, much of it converts to gas and is lost to the air. Organic compounds bond to the nitrogen and allow it to be released slowly and steadily as the plant needs it. Soil acidity and toxin buffer: Plants have specific tolerances in terms of soil acidity and toxins. Organic matter allows plants to have a greater tolerance to these elements that are common in poor soils. Germination and early seedling growth: Once seeds are planted and the seed coats break down, compost in the soil will act like a sponge, absorbing the water and keeping it moist around the seed for a much longer time. This increases the speed of germination and the likelihood of the young seedling growing through periods of dry weather that would otherwise destroy the tender stems, roots and leaves. Turning waste into food: Compost can easily be made from the waste from your crops, animals, kitchen scraps, and other organic matter that often goes unused. Your compost piles will convert this waste into food for your plants, which in turn will provide more, healthier food for your family.Composting Ingredients
Composting is an aerobic process, meaning it requires air circulation to promote decomposition. The process relies on soil microbes to decompose the organic materials that make up your compost pile. The decomposition process will heat up the soil to 120°F to 140°F (49°C to 60°C) after a couple of days. The pile will cool off after a few more days, and when you turn the pile to aerate it, it will heat up again. Five elements work together to form compost:- Carbon
- Nitrogen
- Air
- Water
- Bacteria
 Compost Enhancement Materials
It is also good practice to add other materials to your compost to enhance the quality or the nutrient load. For the purposes of making compost these materials are not considered carbon-rich or nitrogen rich and should not be used in the same quantities as the standard materials. These optional composting materials can include:
Compost Enhancement Materials
It is also good practice to add other materials to your compost to enhance the quality or the nutrient load. For the purposes of making compost these materials are not considered carbon-rich or nitrogen rich and should not be used in the same quantities as the standard materials. These optional composting materials can include:
Increases water holding capacity and habitat for microbial life.
Stabilizes pH levels, and adds phosphorous and potassium to the compost.
NOTE: When using wood ash, make sure that no plastic was burned along with the wood.
Rich in calcium, egg shells provide an additional boost of this trace element that your plants will appreciate.
Increases the decomposition rate by encouraging microbial activity. The cost of these materials generally prohibit the purchase of them for adding to compost, but any wastes from the use of these ingredients, including used limes, are beneficial.
Adds large quantities of nitrogen. The use of human urine may be culturally inappropriate in some sites. Human urine should only be added to the first compost pile to prevent the spread of human pathogens.
If your family drinks coffee, then add the grinds to your compost pile will add an abundance of organic nitrogen. Coffee grounds can also be added to your amendment materials when amending permagarden beds or mulching around trees.
Meat can rot and produce harmful pathogens that can lead to illness and disease. If it does not decompose fully it can spread these pathogens to your garden.
To avoid the risk of diseases or pests infecting your permagarden, you should remove and burn infected plant materials when you see them rather than adding them to your compost pile.
Some plants can have a negative effect on the microbial life in your compost piles. Some toxic plants include hemlock, juniper, bamboo, gmelina, onion, citrus, castor bean, and eucalyptus.
Pine needles and other plants that have high acidity levels will negatively impact the pH level of your compost.
Plants such as wild morning glory, kuch, Bermuda, striga, or kikuyu may not fully decompose in your compost and could be problematic. Avoid using materials, including their root systems, in your composting materials.
Making Compost
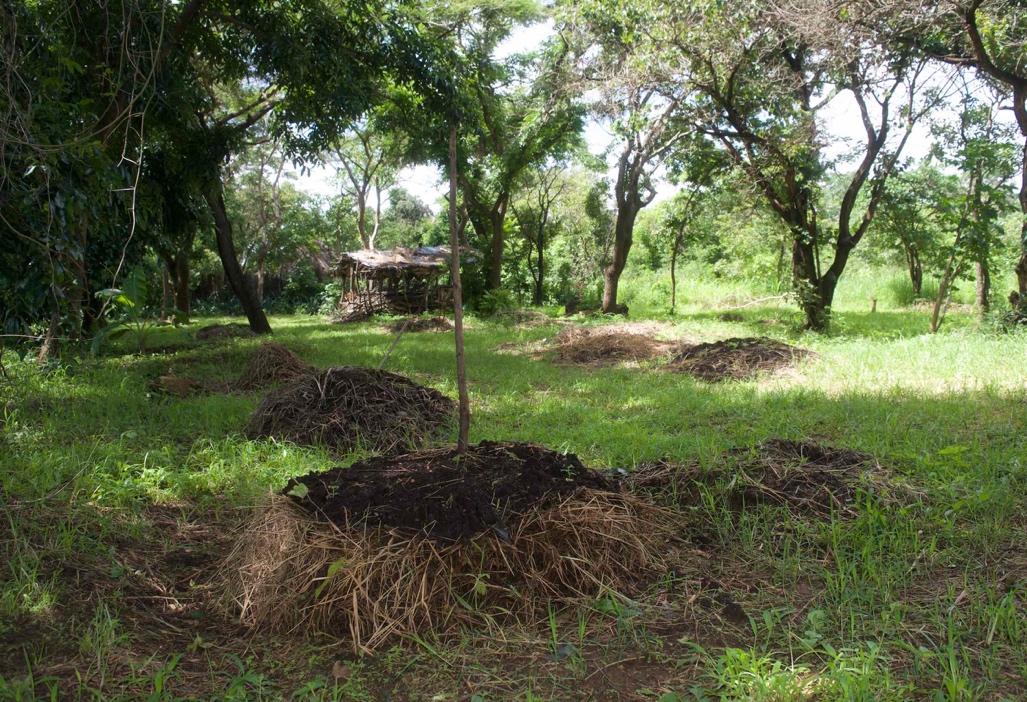
There are many different ways to create and maintain a compost pile. One example that we find very useful is, after finding an appropriate site, to arrange your compost into three piles that will each be built, allowed to decompose, and then rotated on a continuous basis. This will ensure a regular supply of humus-rich compost throughout the year. Identifying a compost site Appropriate placement of your compost piles is important to ensure optimum decomposition and access. Too much sun or too much water will kill the bacteria in it. If you place the piles too far away, you may not maintain them as needed, and you will have to carry the materials and finished compost longer distances. Ideally you should locate the piles on bare ground in a shaded area near the garden. Each pile will cover about one square meter of ground. Leave enough space around each pile to easily access and turn them as needed. You do not want water to collect around and under the piles, so be sure runoff will drain around and away from the compost area. Building and maintaining your compost piles Once an appropriate site is found, follow the steps below to build and maintain your compost:Gather the materials below to start your compost pile. Use a machete or hoe chop down the materials to small pieces – the smaller the pieces, the faster they will decompose. Materials to start you compost pile:
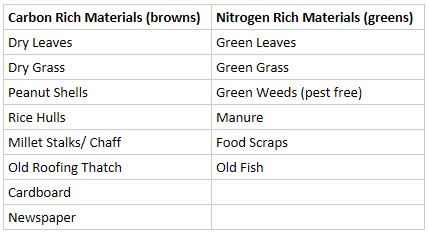
- 6 large sacks of dry, brown (carbon) materials
- 3 large sacks of green (nitrogen) materials (you want to add about 1 part nitrogen for every 4 parts of carbon materials)
- 1 20 liter bucket of manure and/or, fertile topsoil, or finished compost as your source for bacteria
- Compost enhancement materials, if available (e.g. charcoal powder, wood ash, egg shells, etc)
- 3 or 4 – 20 liter buckets of water
- 1 – 3m x 3m plastic sheet, if available
Place a 10 cm layer of brown carbon material on the ground, forming a 1m x 1m square
Add a 5 cm layer of green nitrogen material
Add about 5 large handfuls of bacteria mix
Blend these layers together with your hands, mixing 5 liters of water into it; form the pile back into a 1m x 1m square
Repeat steps 2 through 5 until the pile is 1m x 1m x 1m. Try to keep this shape as much as possible
If you have one available, cover the pile with a sheet of plastic to help hold the moisture and heat in the pile. The plastic will speed up the process but it is not necessary; you can also cover the pile with grass or soil to hold in moisture. This is all you need to do to start the pile.
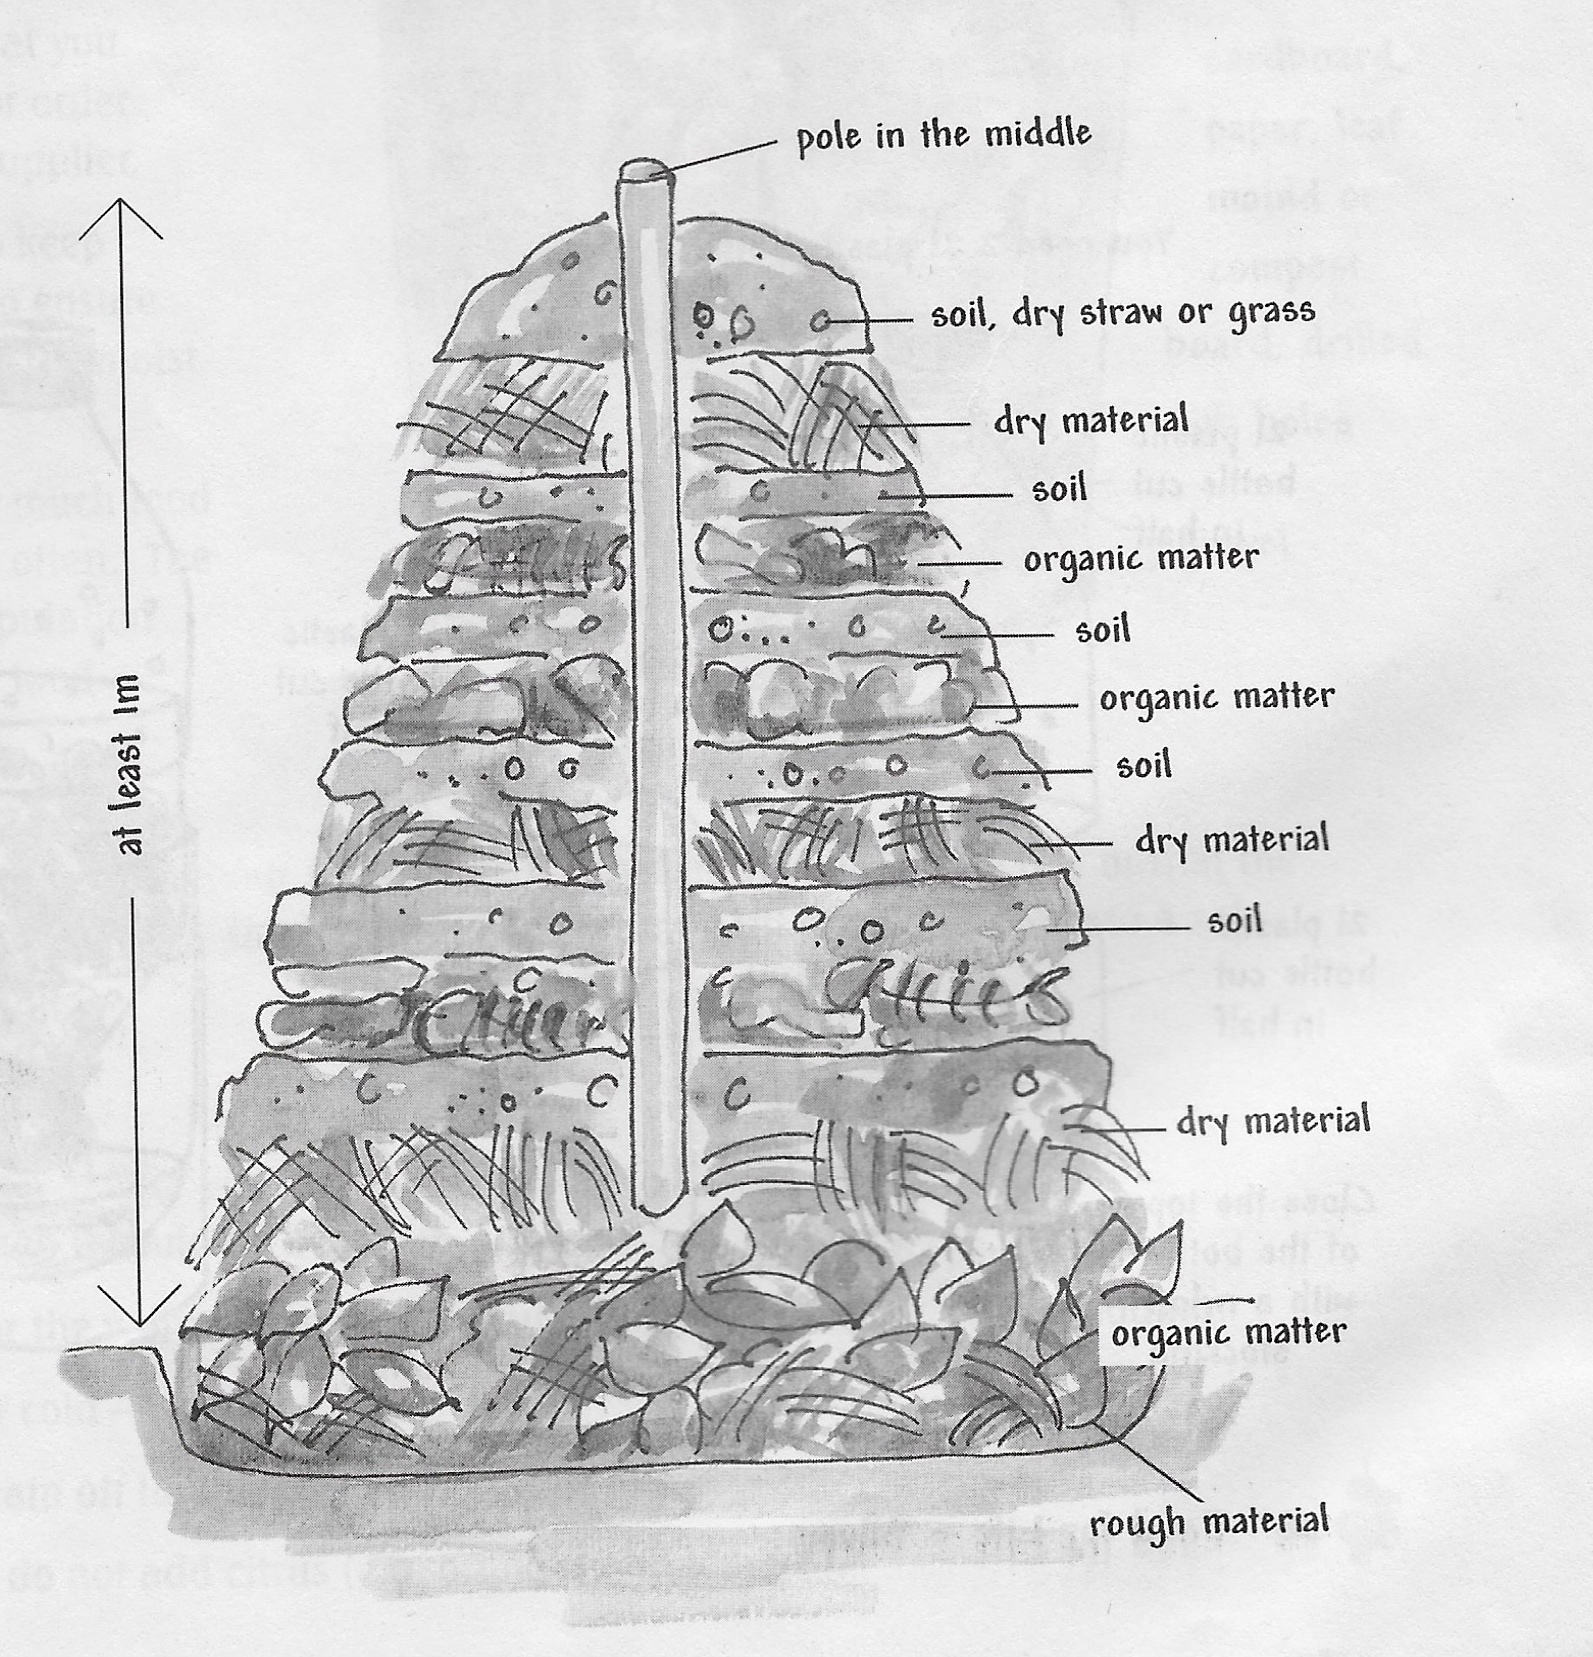
Note: After 2 days the pile will become very hot – this a good thing! It means the bacteria are working to break down the materials. You can place a stick in the middle of the pile, removing it periodically to check that the pile is still hot and moist.
WAIT ONE WEEK, then add 20 liters of water over the top to keep the pile moist then cover it again. Gather more materials for the second pile.
WAIT ANOTHER WEEK, then mix and flip the entire pile to a space next to where it was in order to aerate the compost. Form it back into a 1m x 1m x 1m shape, add 20 liters of water, and re-cover it.
Make another pile where the first one was, following steps 2 through 7.
WAIT TWO WEEKS, then repeat steps 8 and 9. Add water as needed in between to ensure that the piles stay moist. Mix, flip, reform the piles again and re-cover them. Begin the third pile where the first one was.
WAIT TWO WEEKS, then repeat steps 8 and 9, re-covering the pile when done. Continue to mix and flip the piles every two weeks, soaking them in water as needed to ensure they stay moist.
When the first pile is brown, crumbly and cool to the touch (usually after 2 to 3 months) the compost is ready to be used in the garden. Spread this compost where needed in your permagarden or Forest Garden and start a new pile.
- Size of the material – Though it may take some additional work to chop up all of the materials you add to your compost, the smaller they are the faster they will decompose.
- Adequate carbon: nitrogen ratio – If there is too much carbon, the pile will not heat up and will take longer to break down. If there is too much nitrogen, the nitrogen in the pile is released as a gas in the form of ammonia. Ammonia not only smells bad, but it is an indicator that the nitrogen that could otherwise be used as plant nutrient is being lost to the air.
- Adequate aeration – High oxygen levels help feed beneficial bacteria, increasing the heat of the pile and speeding the decomposition process. Turning the pile every two weeks will ensure an adequate oxygen level.
- Adequate moisture levels – A dry compost pile will decompose very slowly and a sopping wet pile runs the risk of rotting. A pile should be damp, but not soggy.
Moisture level – The stick should be damp and moist. Use the following to diagnose moisture content:
- If it is dry the decomposition process will be very slow – add a 20 liter bucket of water
- If it is wet and slimy the pile is too moist, and runs the risk of rotting – turn the pile to aerate it and release some of the moisture.
Heat – The compost pile should start to heat up after about 2 to 4 days if it is properly built. When you touch the stick immediately after it has been taken out of an active pile, it should be uncomfortably hot. If the stick never gets hot, the pile is not functioning. This could mean one of 3 things:
- Not enough moisture. If the stick is dry and the pile is cool, add water and give the pile time to heat up.
- Too much moisture. If the stick is wet and slimy and the pile is cool, turn the pile and aerate it to release some of the moisture.
- Not enough nitrogen materials or bacteria. If the stick shows the proper moisture level, but the pile is still cool, there is not enough nitrogen – or potentially bacteria – for the desired chemical processes to take place. Turn the pile while adding nitrogen materials and manure. Water the pile until it is properly moist.
Smell – If the compost pile is decomposing properly, the smell will change over time. At first, it will smell sour and unpleasant. After about two weeks the pile will start to smell less sour but still not pleasant. After four weeks the pile will start to smell sweeter and by the six week mark it will have a pleasant, earthy smell like a forest after a rain. The compost pile should never stink. If the compost pile begins to smell so bad that you can’t be near it then one of the following might be wrong:
- If the stick is wet and slimy and smells terrible, then there is too much moisture and the pile is rotting. Aerate the pile by turning it thoroughly.
- If the stick is at the proper moisture level and smells terrible, then there is too much nitrogen. Turn the pile while adding carbon materials and water as necessary.
Mulching
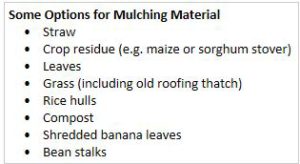
Mulch is organic material that covers the soil to improve moisture retention, reduce erosion, minimize weeds, and improve soil structure.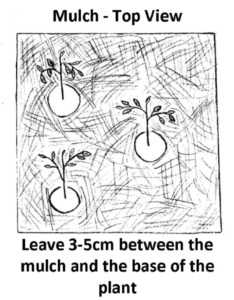 Mulch should be anywhere from 3 to 15cm thick depending on the material being used and what it is placed around. For permagarden beds, a 3 to 5 cm layer of mulch is sufficient and should be placed at least 3 to 5 cm from contact with plant stems to prevent fungal problems. Mulch can be made from any number of plant materials available around your home, fields, or community, including straw, crop residue, leaves, grass (including old roofing thatch), rice hulls, compost, small shredded banana leaves, bean stalks, or any other fine and easily decomposable organic material. Mulching is beneficial for a number of reasons:
When soil is exposed to the sun, microbial life deteriorates, water evaporates, and soil temperatures increase. A thick layer of mulch significantly reduces these effects, maintaining soil quality, conserving water, and keeping soil temperatures cool.
Mulching is important in the dry season as well as the rainy season as it helps to preserve rainwater in the soil for as long as possible. Not only does it keep soil temperature lower, which reduces evaporation, it can also help crops thrive through dry spells during the rainy season. As it preserves a significant amount of water in the soils, even the crops following the rainy season can benefit.
If mulch is thick enough, weeds that sprout cannot make it through the physical barrier, significantly reducing the amount of weeding that is required.
Mulch protects soil from the erosive effects of wind, rain, and hand-watering.
When the soil surface is watered and then dries out repeatedly, a condition called soil crusting occurs. Soil crust is a thin, hard layer that forms over the surface of the soil. This layer prevents water from penetrating the soil and can lead to wilting. Because mulch retains moisture in the soil throughout the day, a mulched bed is unlikely to form a crust.
Mulch decomposes over time, adding humus to the soil surface and improving structure and fertility.
Certain fruits such as cucumber, squash, and melon may rot if left in contact with the soil surface. Placing fruits on top of a thick layer of mulch will keep them dry and safe.
Mulched beds provide better habitat for beneficial earthworm and spider populations than un-mulched beds.
 Mulching Tips
Mulching is not a difficult task, but there are a few things you should keep in mind. Use the following tips to ensure you get the most from your mulch:
Mulching Tips
Mulching is not a difficult task, but there are a few things you should keep in mind. Use the following tips to ensure you get the most from your mulch:
- Leave space between the mulch and plant stems – If mulch is in close contact with plant stems it may promote fungal attack due to high humidity. Always leave at least 3 cms of space between mulch and plant stems.
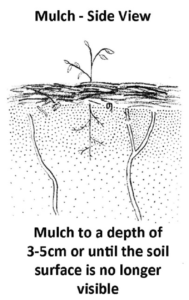
- Mulch to an appropriate thickness – Mulch thickness will vary depending on the type of material being used. Mulch should be thick enough to protect the soil and act as a weed barrier, but not so thick that it prevents water from entering the soil. A good rule to follow is to mulch until no part of the soil surface can be seen. If using leaves, mulch more thinly than if using other materials as leaves tend to create a matt surface, preventing water penetration.
- Chop up your mulch – Particularly for larger plant materials it is a good idea to chop up mulch as finely as possible to ensure maximum water penetration. It will also decompose more quickly, improving your soil structure and fertility.
- Reapply mulch as needed – Mulch decomposes with time. Continually reapply mulch as it starts to break down.